
Structures
Plasterboard bulkhead for indirect light
The bulkhead is the structure that hides the strip. It is made of timber framing and plasterboard, and its dimensions are locked in before the first screw – they do not change afterwards.

What a plasterboard bulkhead is
A plasterboard bulkhead is a box built onto the ceiling or the top of a wall, with the LED strip and profile hidden inside and its edge acting as a glare shield. A light cove is a bulkhead at the wall-ceiling junction; a dropped ceiling is a bulkhead covering the whole ceiling or its central part. The structure is the same: framing, plasterboard, filling, painting.
The bulkhead gives the best result in indirect lighting – no profile shows, only light – but it is also the only structure that needs building work. So it is worth getting right the first time.
Five dimensions decided before framing
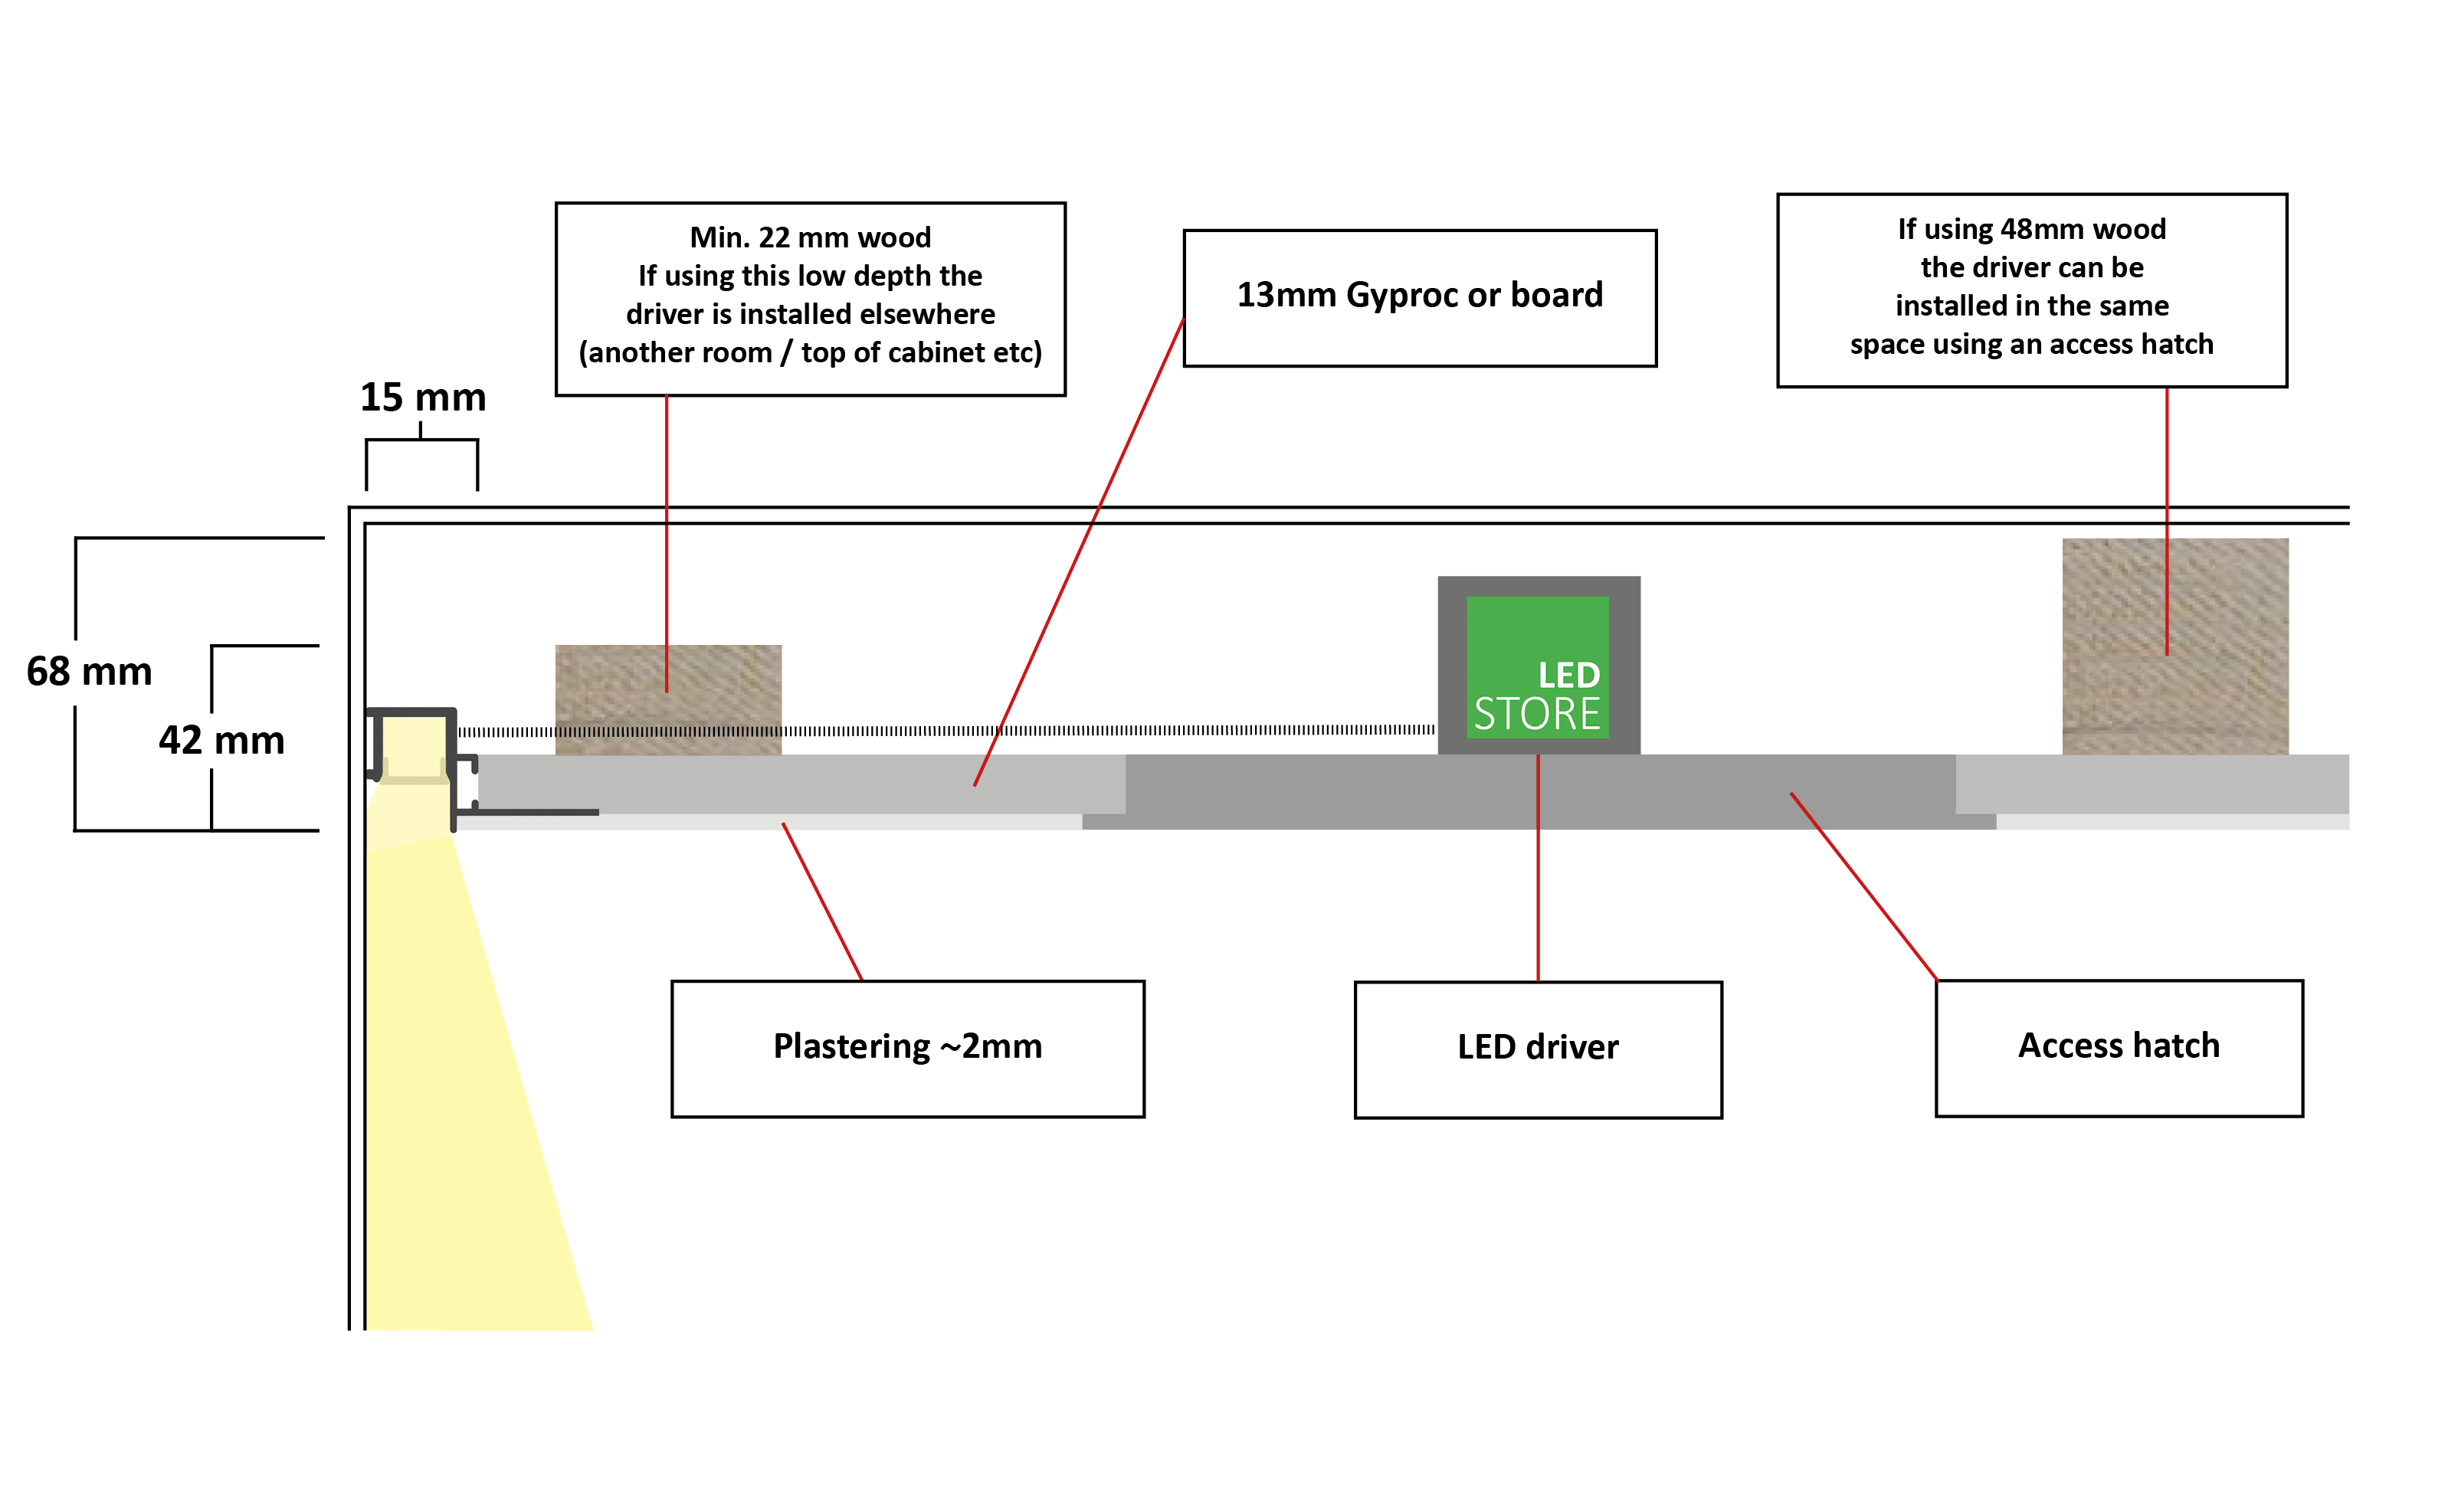
| 1. Bulkhead depth | 50 mm minimum with a low profile. Traditional 48 × 48 framing + 13 mm board = 61 mm. A deeper 100-150 mm box blends the dots better and leaves room for the driver. |
| 2. Light slot width | 30-50 mm. Narrower limits the light to a thin stripe, wider reveals the strip from a seated position. |
| 3. Glare shield height | 30-50 mm with the strip 40-60 mm back, 15-25 mm with the strip right behind the lip. Test seated before the plasterboard goes up. |
| 4. Strip distance from the back wall | at least 40 mm – the light needs room to spread. Under 30 mm makes a sharp stripe. |
| 5. Access hatch position | at least 300 × 300 mm at the driver, or the driver outside the bulkhead. This is the one most often forgotten. |
Building step by step
- Mark the bulkhead line on the wall and ceiling with a laser. Check the room height at several points – in an older house the ceiling is not straight, and the bulkhead will reveal it.
- Framing. 48 × 48 mm timber or metal studs fixed to the ceiling. The front edge of the bulkhead, i.e. the glare shield, is created by the outermost 48×48 batten standing away from the wall. At this stage the dimensions can still be changed.
- Electrics and cable routes. 230 V supply to the driver and 24 V cable to the strip inside the framing. The electrician comes now, not after the plasterboard.
- Profile in place. If a plaster-in profile is chosen, it is screwed to the framing before the board. A surface-mounted profile, by contrast, goes on last onto the painted surface.
- Glare test. Tape the strip temporarily in place, switch it on, sit where the sofa will be. Can you see the strip? Raising the lip now takes 10 minutes. In practice this is skipped 99 % of the time, and people rely on the rule that the lip height must be 1.5 × the strip’s distance from the wall for the glare shield to be sufficient.
- Plasterboard. 13 mm board screwed every 20 cm. The board for the front edge and the underside of the bulkhead. The access hatch frame in place.
- Filling and jointing. Joint tape and filler, sanding, a second coat. The edge of the bulkhead must be straight – the light reveals any waves.
- Painting. Matt or fully flat paint. Gloss reflects the strip as a mirror image. The inside of the bulkhead is also painted white – it reflects light onto the ceiling.
- Strip and connection. Strip into the profile, joints at the access hatch, driver in place. Test before closing the hatch.
In practice: 20 m² living room, light cove on two walls
Bulkhead 100 mm deep, 150 mm wide, 9 metres.
- 48 × 48 battens, about 40 m
- 13 plasterboard sheets
- 5-10 kg of filler
- 5 l of paint.
- Building materials about €1000.
- Labour from an experienced carpenter 2 days + painter 2-3 days, about €2000.
- Strip 14.4 W/m, 4+9 m (L-shape) = 200 W, 240 W driver behind the access hatch.
Three mistakes that mean demolition
- Driver plastered in. No access hatch. The driver fails in 5-10 years, and replacing it means opening the ceiling. Always a hatch or the driver outside the bulkhead.
- Glare shield sized standing up. The strip shows from the sofa. The fix is raising the lip, which in a finished bulkhead means new board, filling and painting. Or an L-shaped plastic trim glued to the edge to raise the lip by 2 cm.
- The bulkhead edge is not straight. The light reveals a millimetre wave over a metre. A laser-marked line and careful filling – no shortcuts.
Paint the inside of the bulkhead white!
The inside of the bulkhead is part of the luminaire. Unpainted plasterboard is grey and absorbs 30 % of the light. A white matt inner surface reflects it onto the ceiling. This is the cheapest way to get 30 % more light.
Light cove → · Dropped ceiling → · Glare shield → · Construction details → · For contractors →
Plaster-in profiles → LedStore
Frequently asked questions
How deep a plasterboard bulkhead is needed?
The space required starts at 50 mm with a low profile. Traditional 48 × 48 framing and 13 mm board take 61 mm. A deeper bulkhead blends the dots better and leaves room for the driver.
How is a plasterboard bulkhead built for indirect light?
Framing at the wall-ceiling junction, electrics and profile into the framing, glare test, plasterboard, filling, matt paint. The decisive order: profile and cables before the board, test before the board.
Which profile for a plasterboard bulkhead?
A plaster-in profile whose edges sit under the board – a seamless result with no visible profile. Or a low surface-mounted profile at the bottom of the bulkhead for easier installation.
Can a plasterboard bulkhead be added afterwards?
Yes, but it takes 50-60 mm of ceiling height and needs filling and painting. For retrofits there are surface-mounted profiles that take 18-29 mm and need no building work.
How wide a light slot for a plasterboard bulkhead?
30-50 mm. Narrower restricts the beam too much, wider reveals the strip from a seated position. The slot width and lip height together decide whether the strip is visible.
What does a plasterboard bulkhead cost?
Materials about €25-30/m, labour €100-200/m from a carpenter and painter. A 9-metre light cove totals €1500-2000 without the lighting. Strip, profile and driver add €500-700.
Profile-SURFACE-2m · valkoinen, musta tai harjattu
Profile-INDIRECT-curve-W-3m
profile-INDIRECT-Z-2m
Hinnat sisältävät ALV 25,5 % ja ovat LedStore.fi:n voimassa olevia hintoja. Profiilit sisältävät opaalikannen ja päätypalat; LED-nauha tilataan erikseen.
Toteutettuja kohteita
Kipsilevykotelo toteutettuna
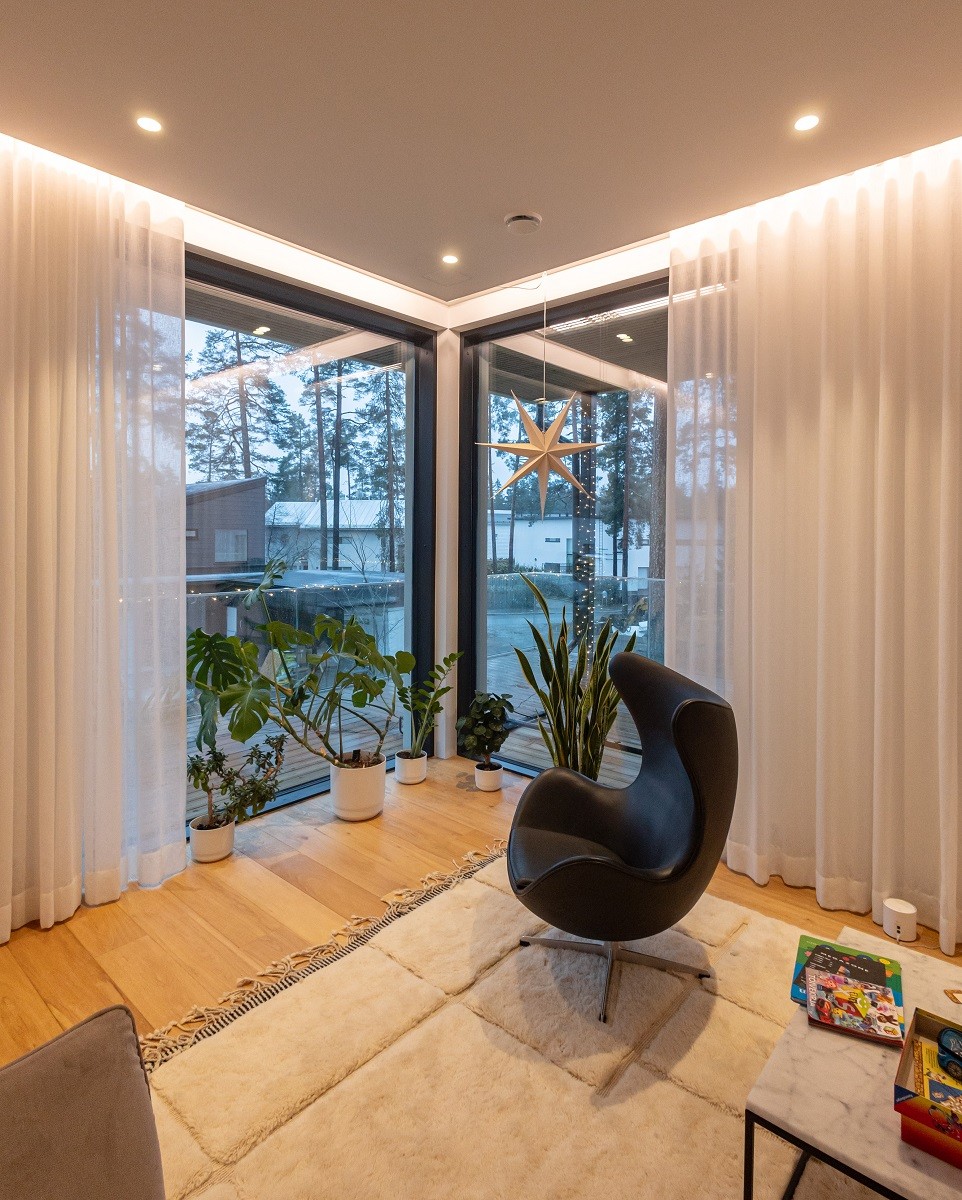
Valmis kipsilevykotelo katon reunassa: nauha täysin piilossa, näkyvissä vain valoaukko ja tasainen valo kattopinnalla.
Kuvat: LedStore.fi toteutetuista kohteista.