
Epäsuoravalo.fi
Retrofit indirect lighting – 18 mm is enough
Three ways to get indirect light into a finished home without plasterboard work: DECO surface profile, INDIRECT-1 wall profile and a light moulding behind a timber trim.

Starting point
The room is finished. The ceiling is closed. The electrics are in the walls, not the ceiling. None of this can be changed without significant demolition.
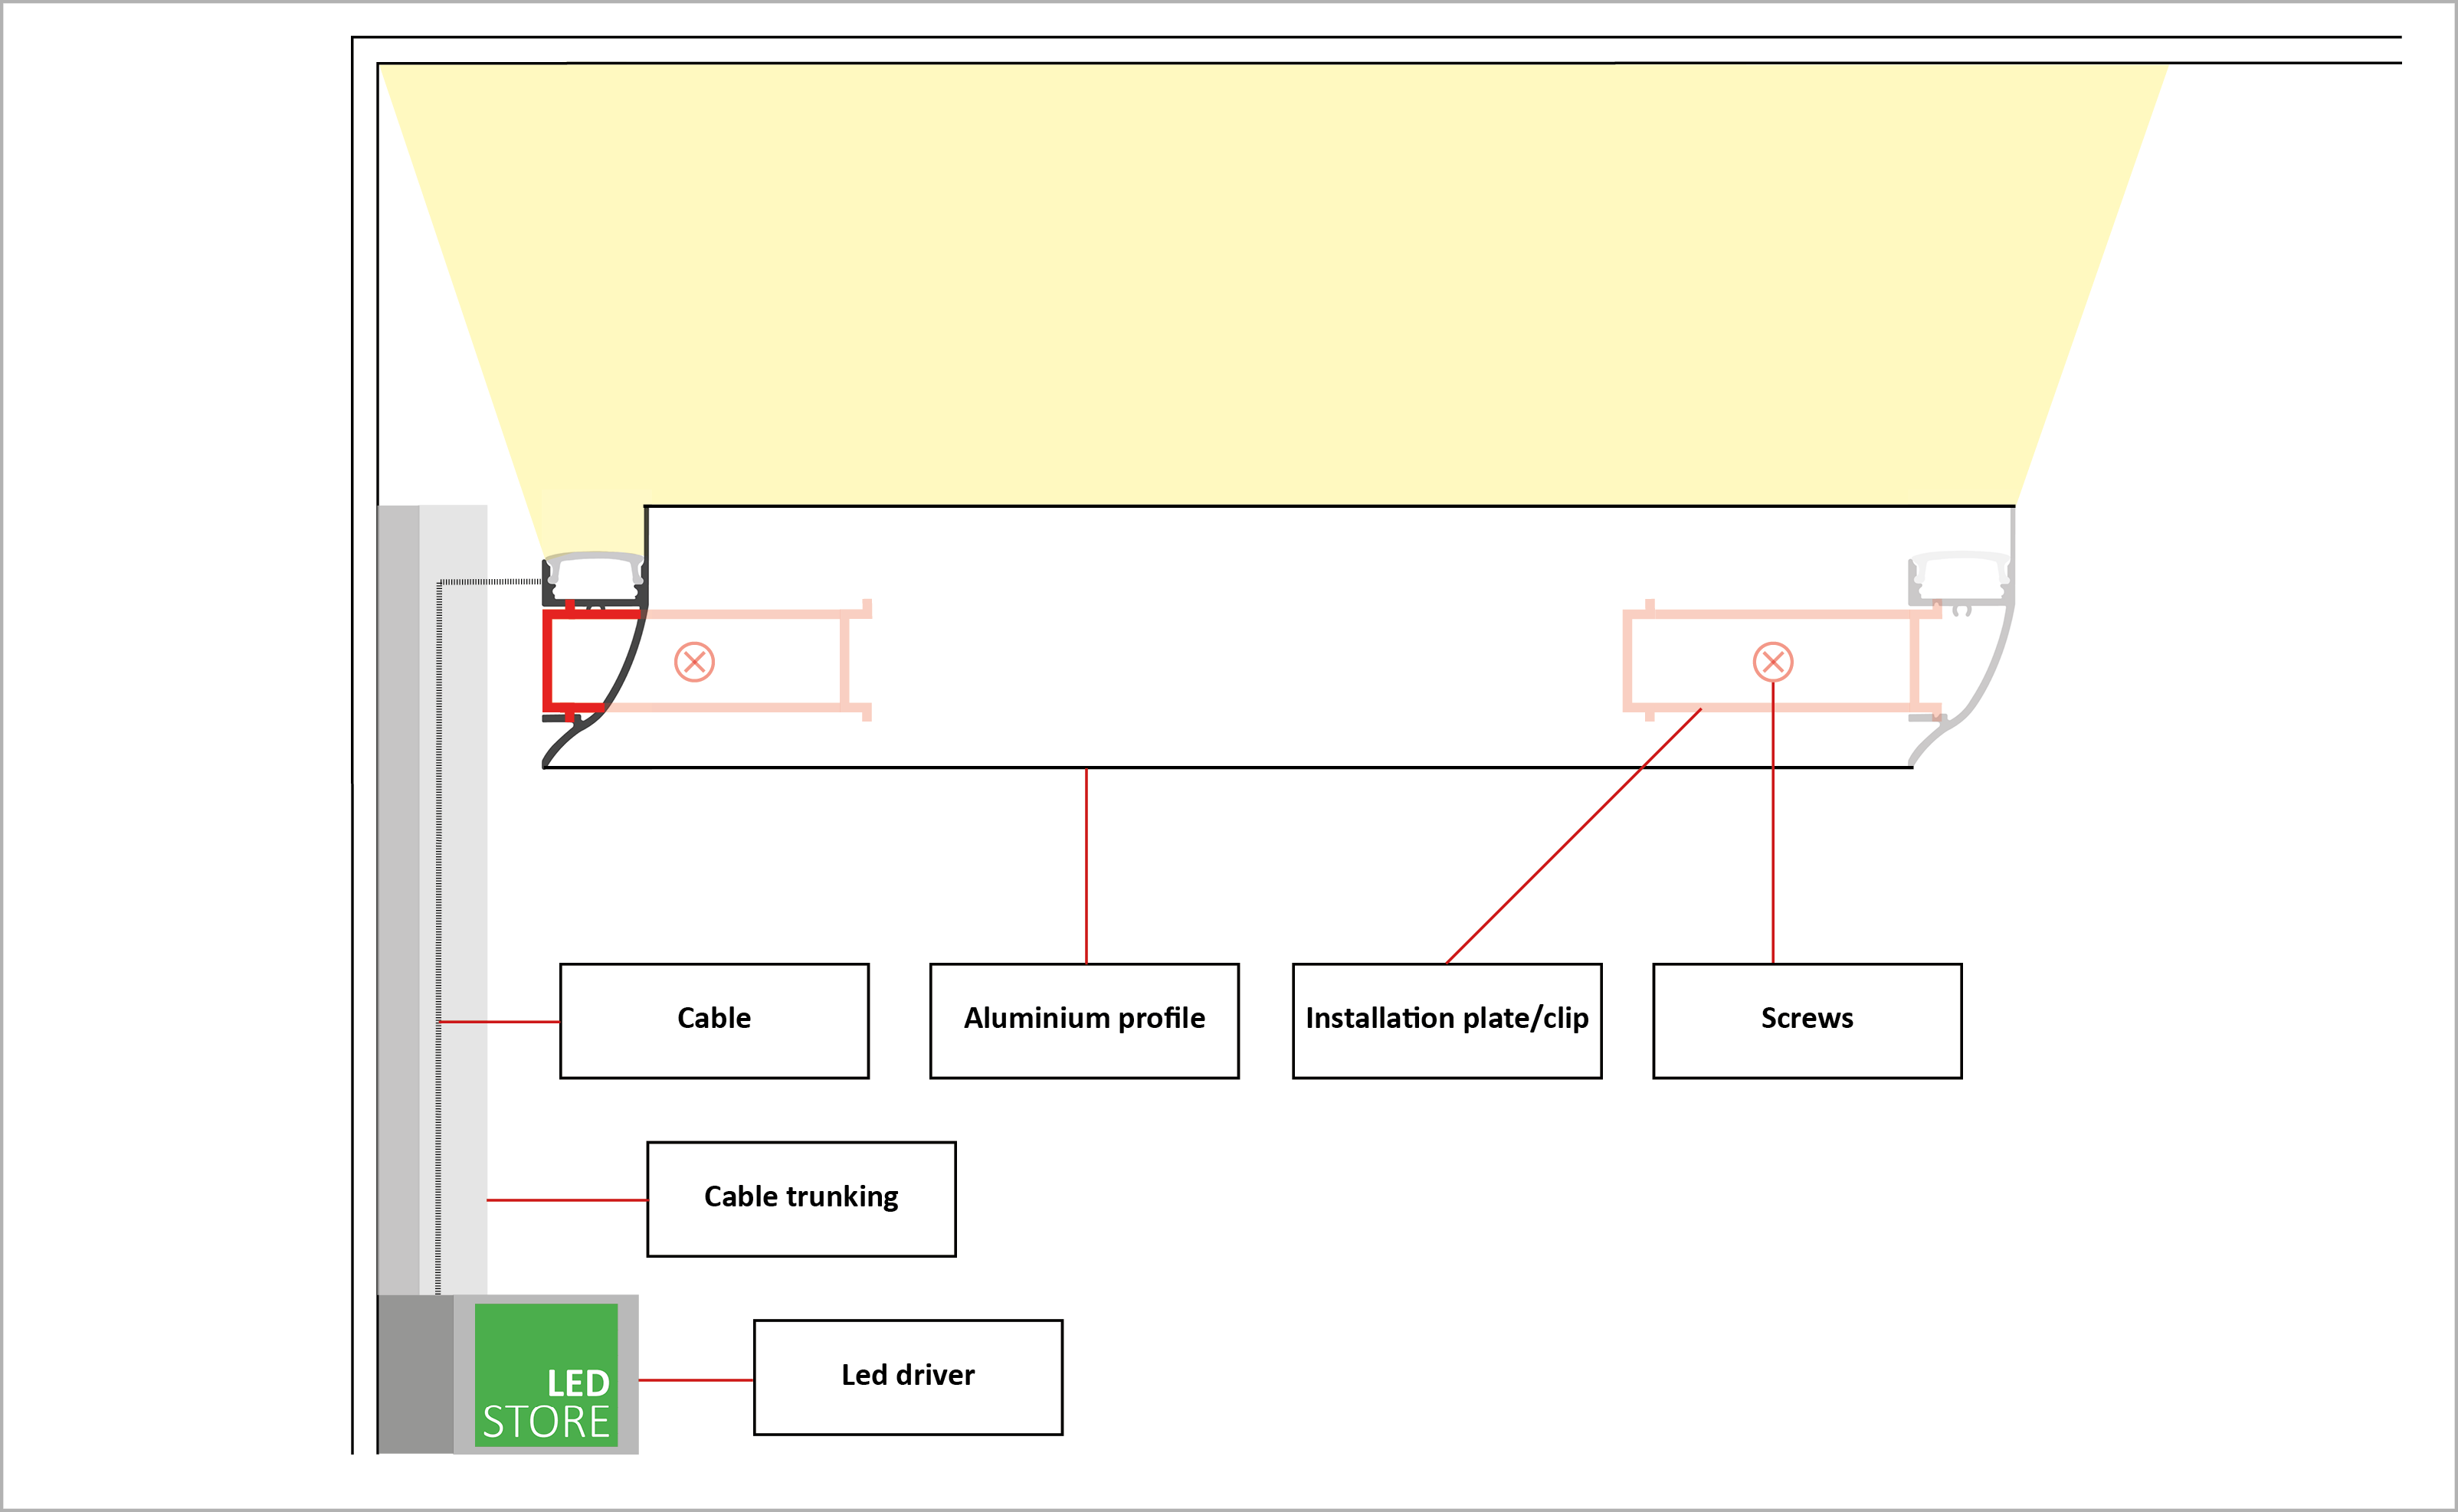
You can still get indirect light afterwards – but the choice has to be made with open eyes. Every retrofit solution is a compromise between space required, light quality and amount of work.
Three solutions – choose by space required
Solution A: DECO surface profile at the wall-ceiling junction – 29 mm

Retrofit with a profile at the wall-ceiling junction. Light upwards towards the ceiling. No demolition.
How it works: The DECO profile is screwed to the ceiling or wall at the wall-ceiling junction – into concrete, plasterboard or timber. The profile also covers the curtain track, so one product solves both hiding the track and the lighting. LED strip into the profile, cable inside the profile and out at the end. Runs from a socket via the driver, controlled wirelessly with a push-button.
| Space from the wall | 29 mm |
| Max strip width | 20 mm |
| Mounting | Screw fixing, surface-mounted |
| Electrical work needed | No – a socket is enough |
| Difficulty | Easy |
| Light quality | Good |
Pitfall: The cabling is the only visible part. If the cable cannot be hidden inside the profile or under a cover strip, it stays visible. Plan the cable route before buying.
Product from LedStore: DECO surface profile for the wall-ceiling junction, 55 × 29 mm →
Solution B: INDIRECT-1 on the wall, 20-30 cm below the ceiling – 18 mm
How it works: The slim INDIRECT-1 profile is screwed to the wall 20-30 cm below the ceiling – not tight to the wall-ceiling junction. The distance is the whole point: the light can open up and spread before it hits the ceiling, so there is no sharp beam on the ceiling but an even reflection. Mounted at the junction, the same profile would make a bright line right at the top edge. Only 18 mm from the wall; the IP44 version also suits bathrooms.
| Space from the wall | 18 mm |
| Max strip width | 12 mm |
| Mounting height | 20-30 cm below the ceiling |
| IP rating | IP44 (splash-proof) |
| Suits bathrooms | Yes |
| Difficulty | Easy |
| Light quality | Good |
Product from LedStore: INDIRECT-1 wall profile, 3000 × 41 × 18 mm →
Solution C: Light moulding / small box – 30-80 mm
How it works: A small box at the wall-ceiling junction built from timber, MDF or a ready-made light moulding. The only way to get indirect light that looks like a real dropped ceiling afterwards without plasterboard work. Needs basic carpentry skills.
| Space required | 30-80 mm from the ceiling |
| Building work | Carpentry |
| Difficulty | Moderate |
| Looks like | A real dropped ceiling |
| Light quality | Good-Excellent |
| Materials | MDF, timber or ready-made moulding |
Tip: Always paint the inside of the box white before installing the strip. The lightest possible surface reflects the most light onto the ceiling.
Electrics in a retrofit
The most common question: where does the power come from?
| Solution | Space required | Amount of work | Bathroom | Light quality |
|---|---|---|---|---|
| DECO surface profile | 29 mm | Very little | No | Good |
| Wall profile IP44 | 50 mm | Little | Yes | Good |
| Light moulding / box | 30-80 mm | Carpentry | No | Excellent |
Option 1: A socket. Driver near a socket, cable inside the profile or under a cover strip. The easiest and quickest. No electrician needed if the socket is already there.
Option 2: Adding a junction box. An electrician adds a supply at the wall-ceiling junction. Neater – no visible cable. Requires an electrician.
Option 3: Wireless dimming. Zigbee driver in a socket + wireless wall button. No cable runs needed. Works well but is an extra device. Zigbee controllers from LedStore →
230 V mains strip must not be fixed to the structure without a cover. A 24 V driver system on a socket is neater and safer in a retrofit.
What it costs
| Project | Solution | Materials | DIY installation |
|---|---|---|---|
| One wall ~4 m | Z-profile | €80-150 | 2-3 h |
| Living room ~14 m | Wall profile | €200-400 | 4-6 h |
| Living room ~14 m | Light moulding | €300-600 | 8-14 h |
Products for retrofit → LedStore
Frequently asked – retrofit
Can I do a retrofit myself?
A Z-profile and wall profile are easy without professional help – a drill, screws and a socket are enough. A light moulding needs basic carpentry skills. Electrical installation must not be done yourself.
Is a retrofit suitable for a rented flat?
A Z-profile and wall profile leave only screw holes. They can be removed and the holes are easy to fill. Check your tenancy agreement and ask the landlord if needed.
What is the smallest possible space required?
The DECO profile takes 29 mm and INDIRECT-1 only 18 mm from the wall. With less space, the only option is a very thin light moulding or a furniture light strip mounted directly on the wall, for example under a shelf.
How is the cabling kept invisible?
Inside the Z-profile the cable runs hidden. The short cable from the socket to the profile is covered with a cable strip or wall duct. A white strip, or one matching the wall colour, blends in best.
Which profile type for a bathroom?
An IP44-rated wall profile. Standard profiles are not suitable for damp rooms. The strip must also be at least IP44. Damp-room LED strips from LedStore →
Is 40 mm the absolute minimum?
With DECO and INDIRECT-1 profiles, yes. A low furniture light strip or thin wall moulding can be mounted closer to the ceiling, but the light then comes almost directly and does not spread evenly onto the ceiling. The result is more a line of light than indirect general lighting.
Profiilit tähän rakenteeseen
Profiilit jälkiasennukseen
Pinta-asennettavat profiilit ruuvataan valmiiseen seinään tai kattoon. Ei purkua, ei kipsitöitä, ei tasoitusta – asennus valmistuu tunneissa.
Profile-INDIRECT-wall-2m · valkoinen tai musta
Profile-INDIRECT-1-W-3m
profile-INDIRECT-2-3m · harjattu tai musta
profile-INDIRECT-3-W · 2,5 m tai 3 m
Profile-curtain-DECO-W-2m
Profile-floor-molding-3m
profile-shelf-EDGE-W-3m
Profile-indirect-molding-stairs-3m
Hinnat sisältävät ALV 25,5 % ja ovat LedStore.fi:n voimassa olevia hintoja. Profiilit sisältävät opaalikannen ja päätypalat; LED-nauha tilataan erikseen.
Toteutettuja kohteita
Jälkiasennus toteutettuna
Pinta-asennettuja profiileja valmiiseen tilaan – ei purkua, ei kipsitöitä.
Kuvat: LedStore.fi toteutetuista kohteista.
Products for retrofit → LedStore
How it was done in a real project
This page covers dimensions and structure. The LedStore blog shows the same solution built, with photos.
Indirect light to the ceiling, retrofit with an LED profile – Three rooms, photos and work steps